HTML Lab: Art Gallery
This lab will give you practice writing some HTML, CSS, and SVG by hand.
You may not use GenAI to write code for this assignment, the purpose is to gain experience writing these elements by hand to understand how they work.
Optional Alternate Assignment
If you have used HTML/CSS before, you may decide this exercise is too basic to learn from. If you would instead like to get some practice & upgrade your HTML/CSS skills you can create your own more advanced version of the exercise by picking any site you like & building a mock of it that replicates the major elements. (e.g. you pick uchicago.edu, you do not have to make a 1:1 replica of the site, but make a page that replicates most of the main visual elements: a header, secondary menu, hero image, etc.)
The best way to get better at HTML/CSS is by building real designs and using view-source to understand how other pages are put together.
Part 0: Preparation
You'll be making a small art gallery to get practice embedding images in HTML and positioning content.
Create a new directory for this assignment with a file named index.html that contains the following:
<!DOCTYPE html>
<html>
<head>
    <meta charset="UTF-8">
    <meta name="viewport" content="width=device-width, initial-scale=1.0">
    <title>HTML Lab</title>
    <style>
      /* Part 2 CSS should all be within this tag. */
    </style>
</head>
<body>

<!-- Part 1 Content should all be within the body -->

</body>
</html>
Next, you'll need to collect at least 9 public domain images. You'll want to divide these into at least two groups, for example I used AIC images & Halloween images.
Some sites that you can use:
- The Art Institute of Chicago: Open Access Images
- Public Domain Image Archive
- Smithsonian Open Access
For each image, collect the original page URL and download a copy of the image and place them in the images/ directory.
Part 1: HTML
For the first part of the assignment, you will build out the page content in HTML.
Each of the steps below will give you a container element that should be included within the <body>, determining what is within that element is up to you.
1A: Page Header
Your page will have a header with a title for your gallery.
Add a <header> element, this element should contain an <h1> with the title for your page.
- https://developer.mozilla.org/en-US/docs/Web/HTML/Reference/Elements/header
- https://developer.mozilla.org/en-US/docs/Web/HTML/Reference/Elements/h1
1B: Page Navigation
Your page will need at least three sections: two based on the content you collected, and a third titled "Original Artwork".
Add a <nav> element which contains links to these three (to-be-written) sections.
You will need to use <li> and <a> tags.
When creating your links, for now give them placeholder references starting with #, for example:
<a href="#original">Original Art</a>
- https://developer.mozilla.org/en-US/docs/Web/HTML/Reference/Elements/nav
- https://developer.mozilla.org/en-US/docs/Web/HTML/Reference/Elements/a
1C: Main Section
Finally, within a <main> element, you will put your actual gallery content.
Within this section you should have three subsections, each of which should be within a block element of your choosing. Each of these elements should:
- start with an
<h2>with the name of the section - contain multiple
<div class="gallery-item">, each one including (each within appropriate markup): - an embedded image
- a link to the source URL, where the link text is the name of the piece
- a caption
This portion will necessarily require some copy/paste. That is expected and necessary to keep your various gallery images/sections looking uniform down the line.
1D: Links & References
Finally, to make your links work, the references you chose in part 1b (e.g. #original) need to reference valid id attributes.
The href= that you chose for your nav items need to correspond to id= attributes on your various sections.
<a href="#photography"> go to photography </a>

<!-- would link to this, elsewhere on the page: -->

<h2 id="photography">Photography</h2>
Note that the # is within the <a> tag, but not the id= attribute.
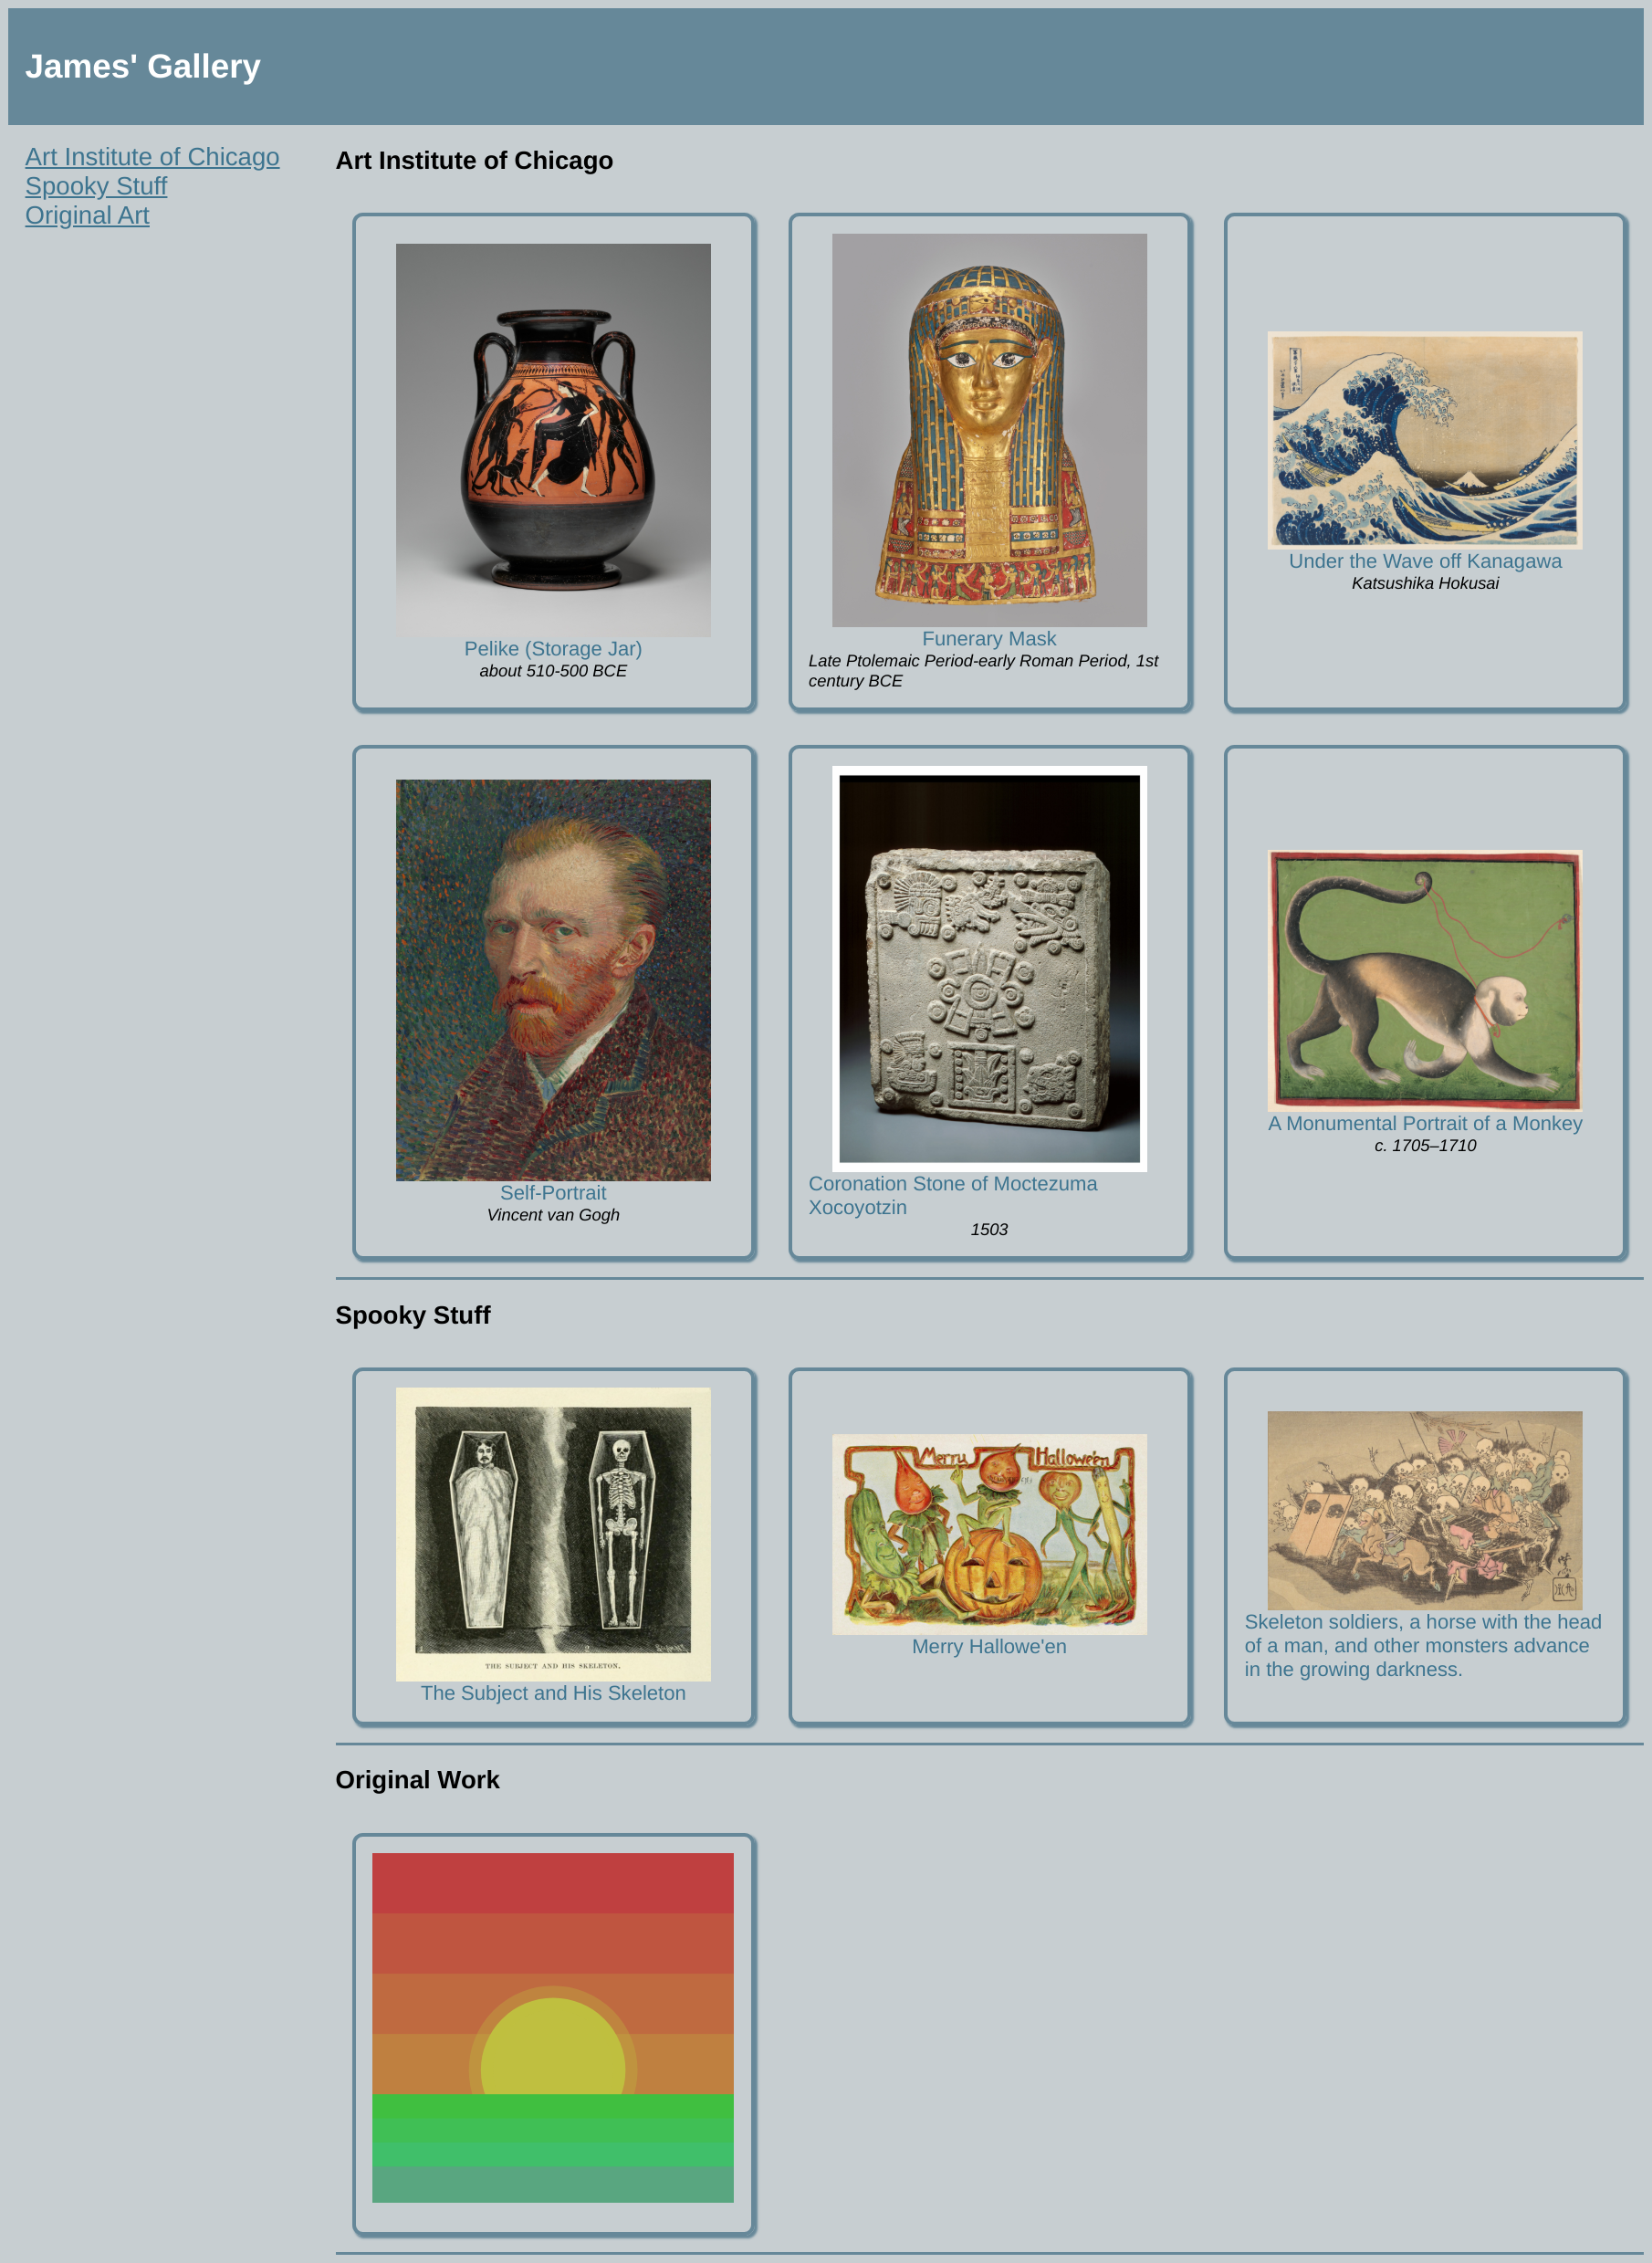
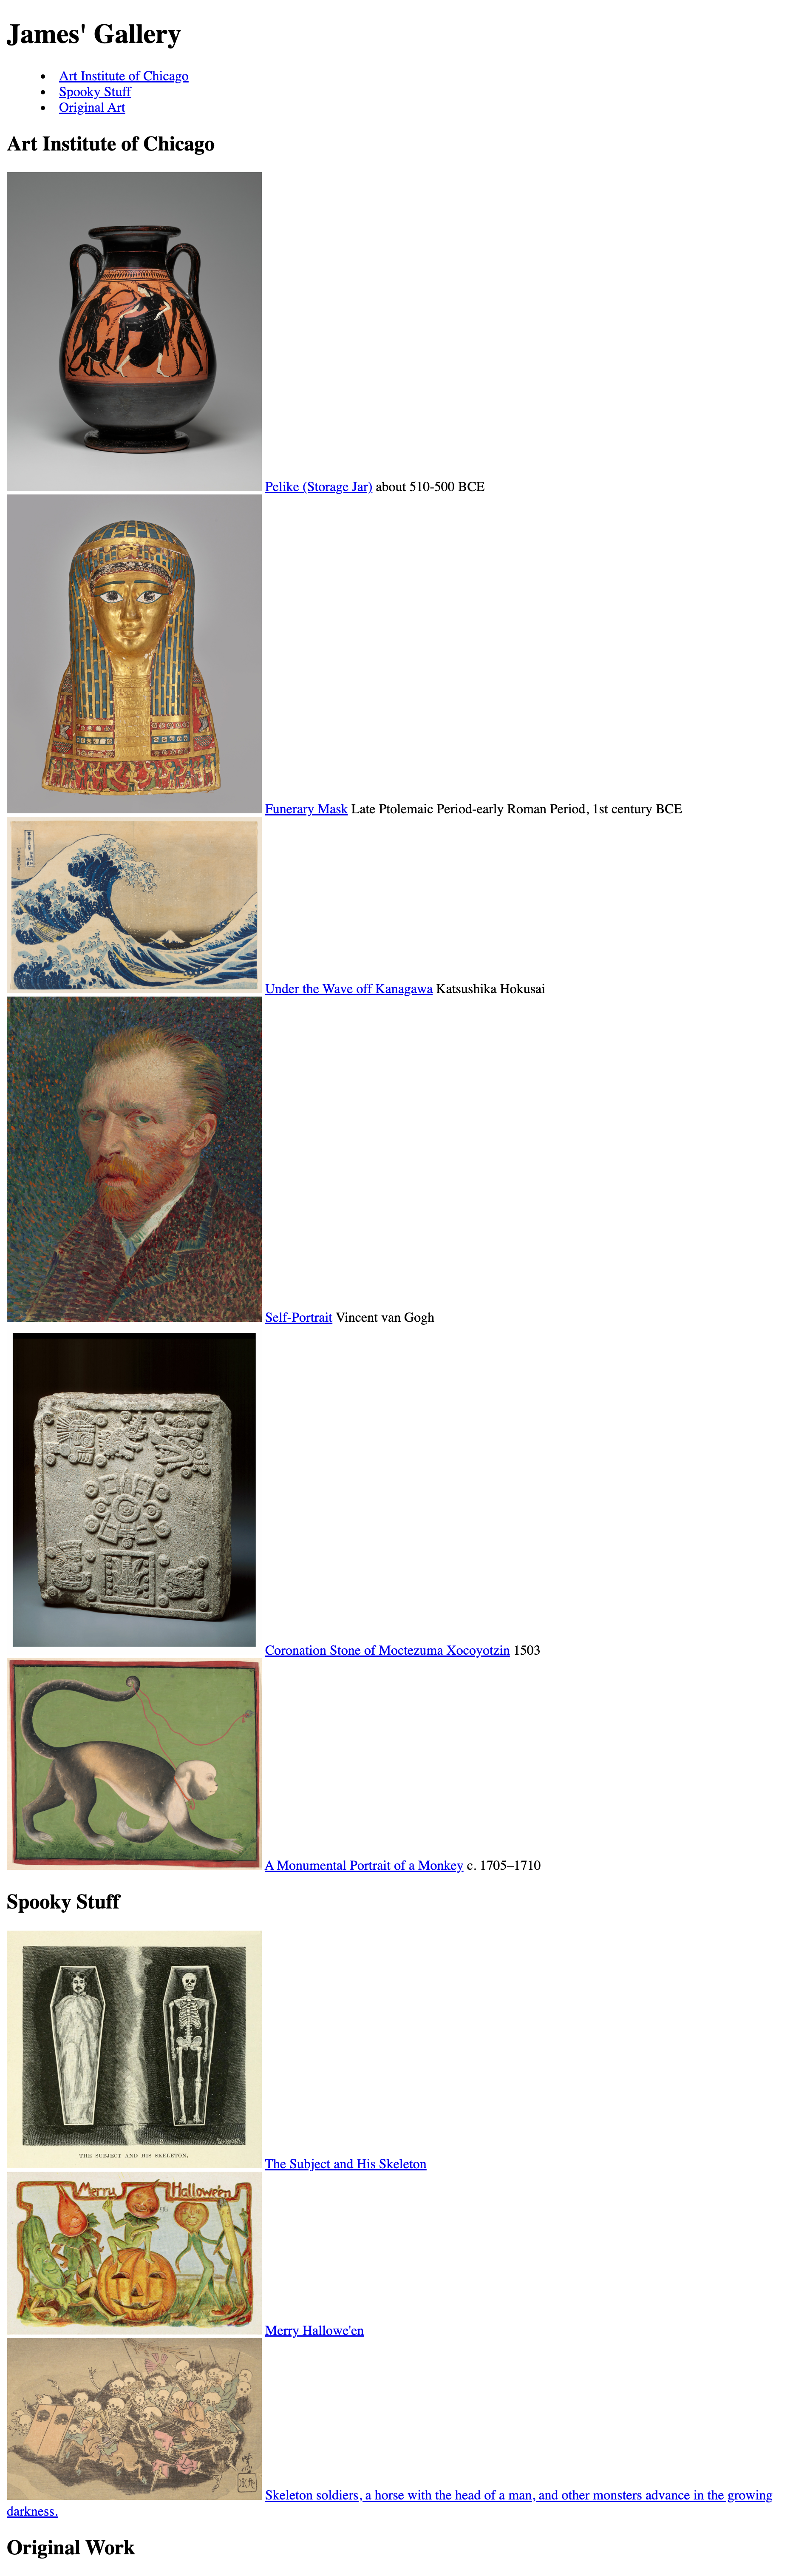
At this point, your gallery content should all be present, but it won't look very nice. Here's mine at this step:
Part 2: CSS
Now we'll apply CSS to make things look the way we prefer.
For this step all CSS must be written within the <style> tag in your page.
You may modify the existing HTML to add id= and class= attributes, and if needed, additional tags.
For each one, we'll suggest a few properties you can adjust, see this guide for possible values and feel free to experiment: CSS Properties
2A: Style the Header
To warm up, give your header a distinct font and color.
To do this you will write a CSS rule targeting <h1>, inside the <style> tag:
h1 {
  /* styles here will be applied to all <h1> tags */
}
Some properties to consider:
background-colorcolorfont-size
2B: Style the Nav
Now you will apply some styling to the nav menu.
This time, instead of targeting all <li>, try targeting only li that are within nav.
This isn't strictly necessary for our page, but would be in the likely scenario where you have <li> on the page that represent different concepts elsewhere on the page.
To target nested elements you can list the selectors sequentially:
nav li {
  /* styles here would only affect <li> that are within nav */
}
nav li a {
  /* similarly, this selector only targets <a> within <li> within <nav> */
}
Properties that may be of interest:
padding- space between content and its border (considered within the element)margin- space around the element (considered outside the element)text-decoration- control underline rules
2C: Style the Content
Now it is time to style the page content as you see fit.
There's plenty of room to experiment here, but make sure you do the following:
- Give the entire page a non-white background color. Hint: you can style the
bodyelement to do this, this is also where you'd set a different font. - Add either a
widthorheighttoimg, depending on your preferences. Avoid setting both as it may distort your images, if you set one the other dimension will scale appropriately. - Each
<div class="gallery-item">should have a consistent visual appearance that sets it apart from the page. Consider borders/background colors/padding/etc. - Ensure each section has a distinct
borderof some kind to make it visually distinct.
You may add id= and class= attributes as needed to select specific elements.
To reduce the number of classes you need to add, it may be helpful to use nested selection:
div.gallery-item img {
  /* this selector applies to all <img> tags that are within a <div class="gallery-item"> */
}
2D: Page Layout Adjustments
All of your block elements (<div>, <main>, <nav>, etc.) simply stack on top of one another, we'd like to use our horizontal space better.
For the final step here, we'll use display: grid to allow elements to sit side-by-side.
First, we'll demonstrate this by converting your nav into a sidebar. Consider the HTML within <body> where you have these two block elements:
<nav>
  ...
</nav>
<main>
  ...
</main>
To get these to exist side-by-side, we will need to wrap them in another container. If we didn't have <header> we could use the already-existing parent (<body>)
but we don't want the header to be affected by our change.
Add a new <div class="main-grid"> to wrap these two:
<div class="main-grid">
  <nav>
    ...
  </nav>
  <main>
    ...
  </main>
</div>
We'll give this new element a grid layout, which tells the browser how its child elements should be arranged:
.main-grid {
  /* these two properties create a grid of two columns,
     where the left column is 25% of page width, and the right the rest
  */
  display: grid;
  grid-template-columns: 25% auto;
}
To complete this step, apply a grid layout to a container around your <div class="gallery-item"> elements so that you can fit 3-4 per row.
Part 3: SVG
Finally, you will hang a piece of your own art in the gallery.
Within your final section of "Original Art" add this tag:
    <svg
      viewBox="0 0 300 300"
      xmlns="http://www.w3.org/2000/svg">
        <!-- your SVG will go here -->
    </svg>
We'll discuss SVG soon in class, but for now think of it like HTML for graphics.
It has a different set of elements, detailed here: https://developer.mozilla.org/en-US/docs/Web/SVG/Reference/Element.
For now stick to these: <circle>, <ellipse>, <line>, <polygon>, <polyline>, <rect>, <text> and draw a small image of whatever you'd like to complete your gallery.
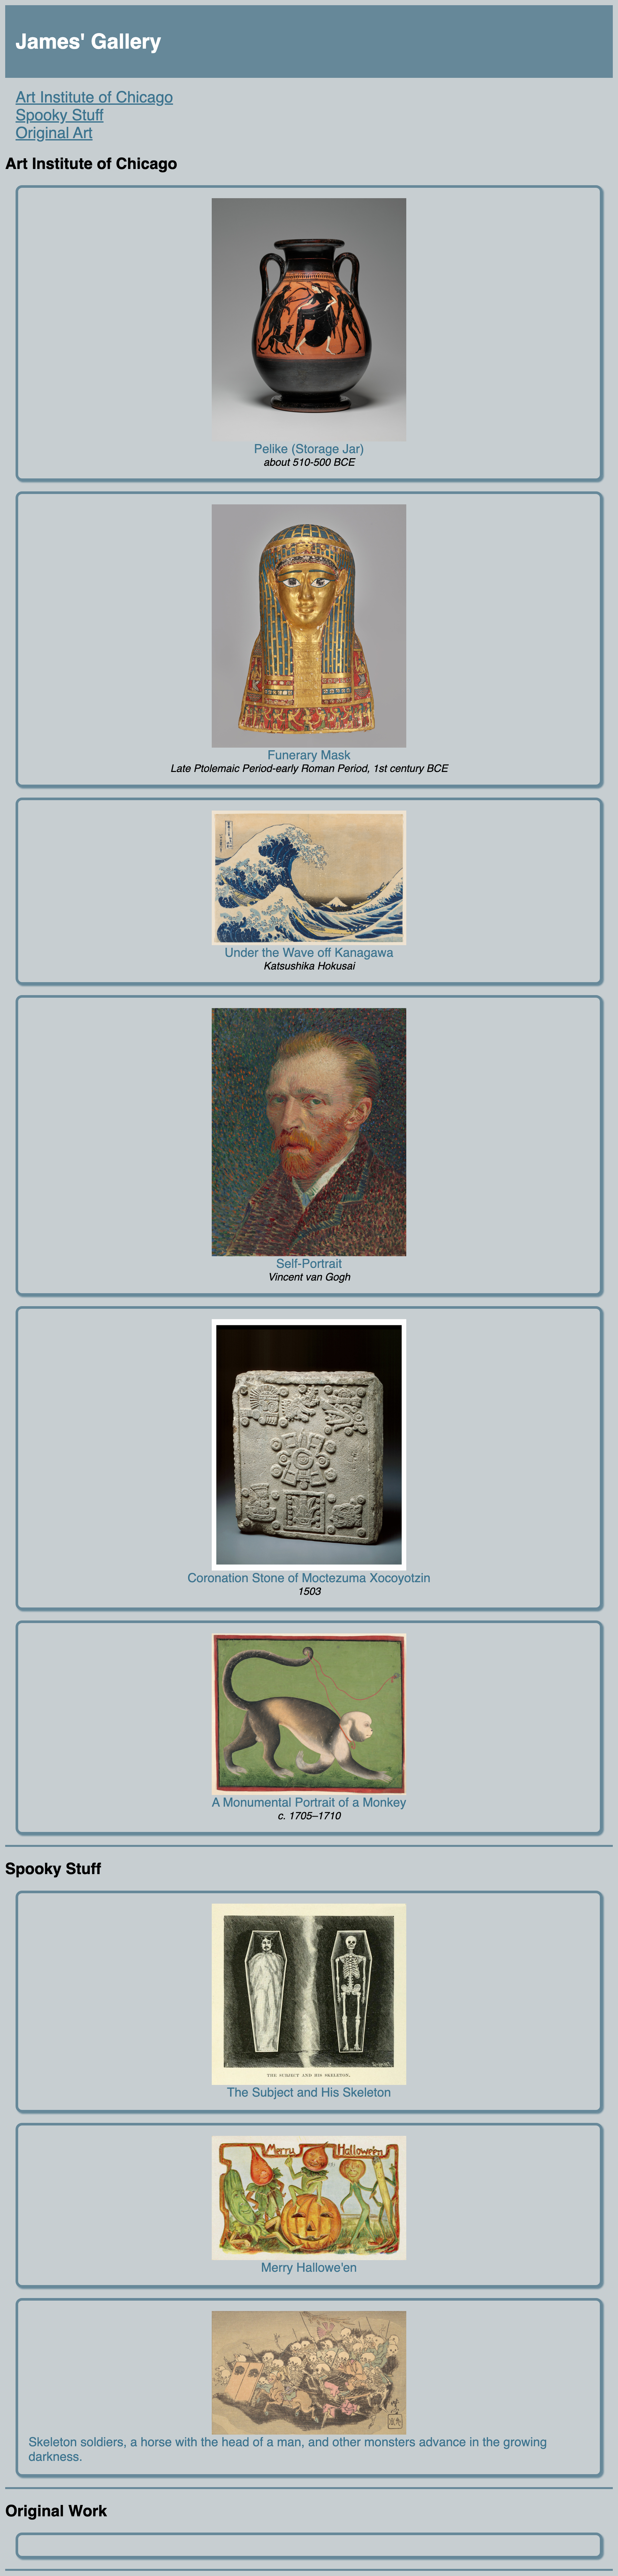
Example Final Product